Intro to Automations
Automations help you automate your daily workflow, in order to save time and be more effective. Triggerbee's Automation feature is based on the logic of If This Then That (IFTTT), which allows you to build workflows that are triggered when a specific event takes place on your website. Every automation require at least 1 trigger and 1 or more action(s) to get started
Example use cases for Automations
- Sending converted visitors to your Email Marketing System
- Tagging visitors based on actions (eg. customer, member, prospect, competitor).
- Sending emails based on actions on the website (eg. abandoned cart)
- Update your CRM with new prospects or data on current customers.
- Sending email to your sales team when interesting leads visit the website
Note: Most of the subscriber and CRM-related automations can be found in the Form Settings in the Campaign editor when you create Forms for your website, but every automation created there can also be found and edited in the Automation section.
Overview
This is what the Automation section looks like. Let's break the sections down...
When this happens.. (The Trigger)
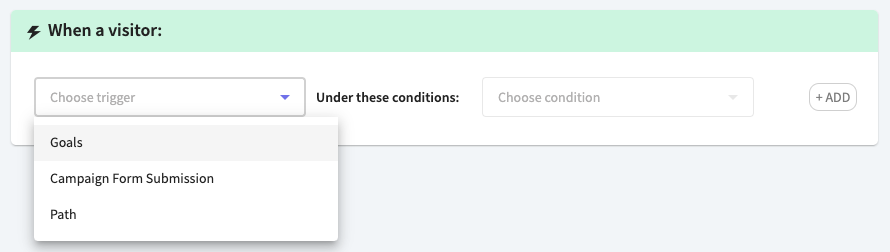
Triggers are events that happen on your website. There are 3 triggers to choose from:
- Goals. An action that has been executed by the visitor, as a sign of engagement. For example, logging in, filling out a form or completing a purchase.
- Campaign Form Submission. When a visitor submits a form (eg. signing up for a newsletter).
- Path. When the visitor visits a specific URL.
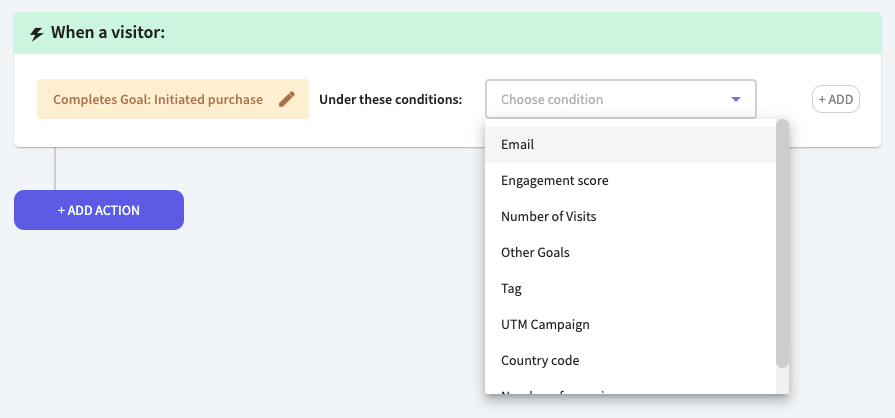
You can also add conditions to your trigger, to filter out certain visits. For instance, only letting through visits with more than 3 visits, that has an email and is from a certain country.
Do this action... (The Action)
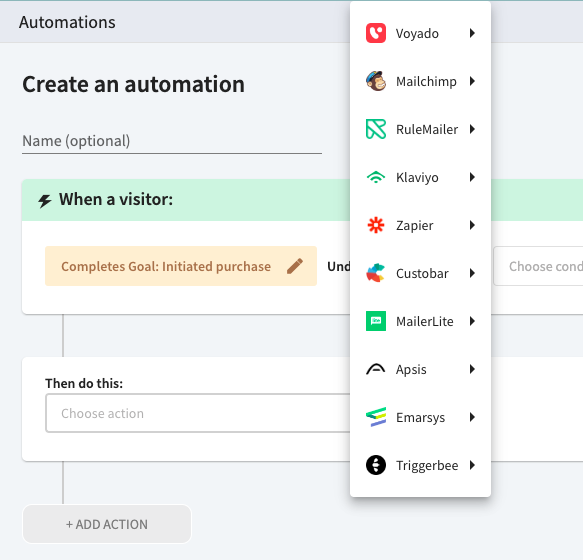
The actions are what happens AFTER the trigger has been fired.
Here are some examples of common actions:
- Add a contact in Voyado, Mailchimp, Rule etc.
- Update contacts in your CRM or Email subscriber tool.
- Add a Tag on a contact in Triggerbee
- Create a deal, person or organisation in Pipedrive
- Send an email notification to someone on your team
Manage Automations
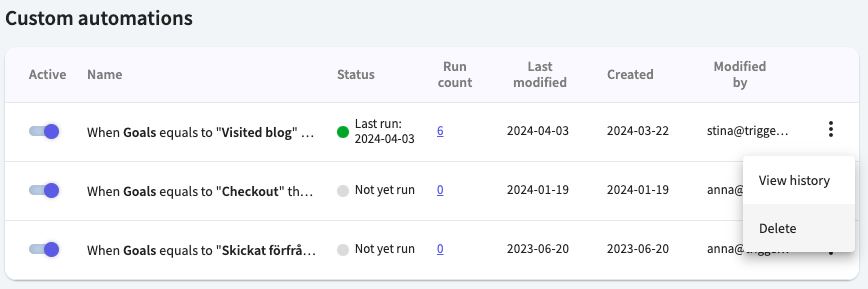
You can find and manage all of your active and inactive automations under the automation tab. The automations are categorized into Customs and Campaigns. Campaign automations are triggered from a specific campaign in Triggerbee. Custom campaigns do not have to be connected to a Triggerbee campaign, instead, these often have triggers such as "Completed goal" and "Visited page".
Activate or deactivate an automation
If your automation has been created through the form settings in the campaign editor, the automation will automatically be turned on and off depending on the status of the campaign. But if you have created a standalone automation, such as triggered from a goal - then you can toggle the automation on and off by a click on this button in the automation overview:

Edit or delete an automation
To edit a current automation, simply click on the row of that automation to open it. Add your changes and press Save to publish it. Deletion is done via the right menu in the automation overview. Only delete automation that you are sure you want to delete, since it will also delete the history of the automation.
Troubleshooting Automations
Whenever automations run into an error, the automation will log an error message and move on to the next step in the automation (if possible). You can see this by the automation status becoming red.

To check the error, open the History of the Automation and toggle the faulty step. The error message will tell you what went wrong and how to fix it. If you want even more detailed information, you can "show the exception" to get the full log.

Any signups or runs through the automation that have failed will not run again after the error has been fixed. We recommend that you manually import any skipped signups to your CRM.